
Overview
This guide will help you to setup WHMCS licensing addon for creating
Webuzo licenses along with your VPS/Dedicated server products.
If you would like to resell Webuzo as a separate WHMCS product please refer to the WHMCS Licensing Module guide here.
Download and Upload
Download the Webuzo Auto licensing Addon here. (Version : 2.1 Updated on : 6th October, 2023)
Unzip it and upload the files webuzo_licensing.php, noc_api.inc and webuzo_mod_extra.php to your following WHMCS path:
/path/to/whmcs/modules/servers/webuzo_licensing
Add The Addon
We need to create the Addons in WHMCS to be able to associate them with your product. We will create separate Addons for each Webuzo Plan.
You can either assign all or individual addon to the products you wish to allow users to select which Webuzo plan they wish to purchase.
In order to add an Addon please navigate to WHMCS admin panel -> System Settings -> Product Addons
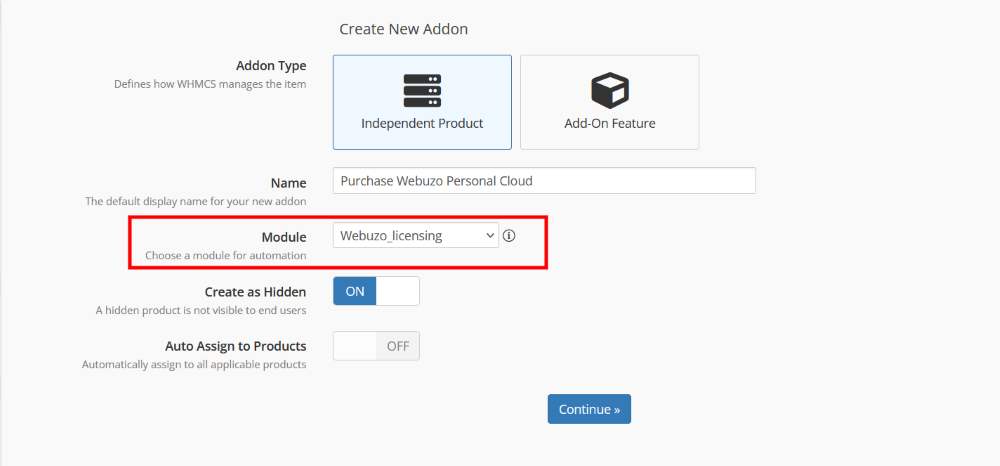
Click on the Add New Addon button
Personal Cloud Webuzo License
Step 1:
- Choose Addon Type : Independent Product
- Name : You can define any name for the addon e.g. Purchase Webuzo Personal Cloud
- Module : Webuzo_licensing
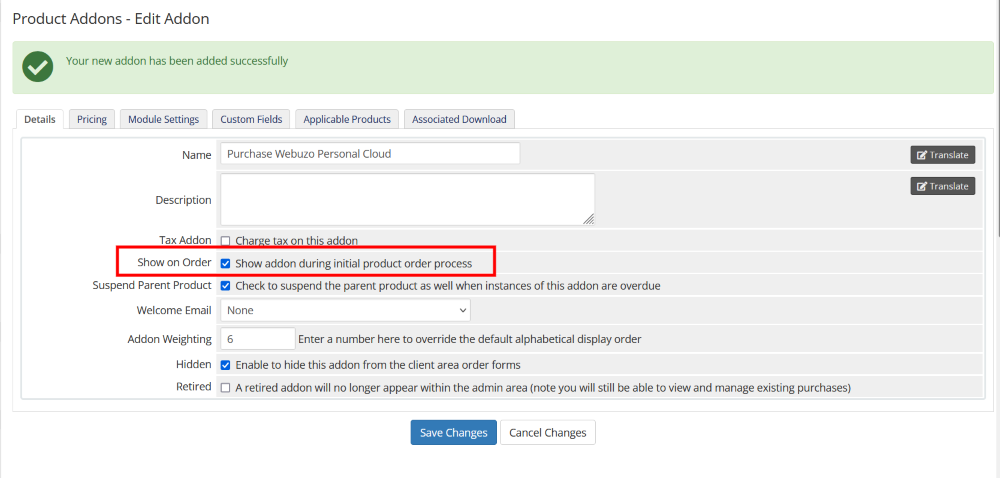
Step 2:
- Select the "Show on Order" checkbox to make sure your users see this addon option while ordering with you
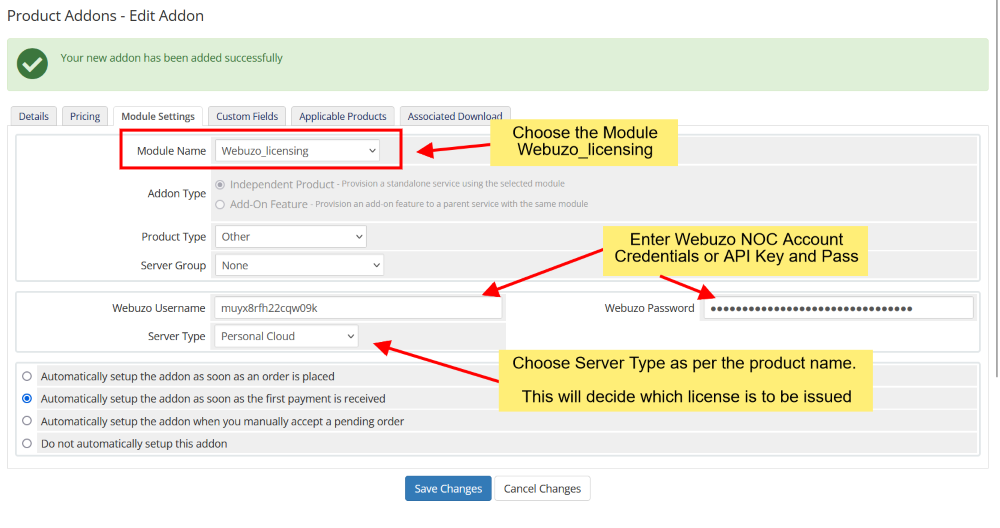
Step 3:
- Go to Module Settings Tab
- Module Name : Webuzo_licensing
- Webuzo Username : Enter your Webuzo/Softaculous NOC account username or API Key
- Webuzo Password : Enter your Webuzo/Softaculous NOC account password or API Pass
- Server Type : Choose the appropriate Webuzo plan you would like to be activated with this addon. E.g. If you want to order Webuzo Personal Cloud license with this addon select Personal Cloud option in Server Type Dropdown.
- Automatic Setup : Choose when the addon should be triggered i.e. as soon as the order is placed or as soon as the first payment is received etc.
Note: It is important to choose the Setup option for each Product Addon along with the Primary Product. This ensures your module and the addon is activated at the same time.
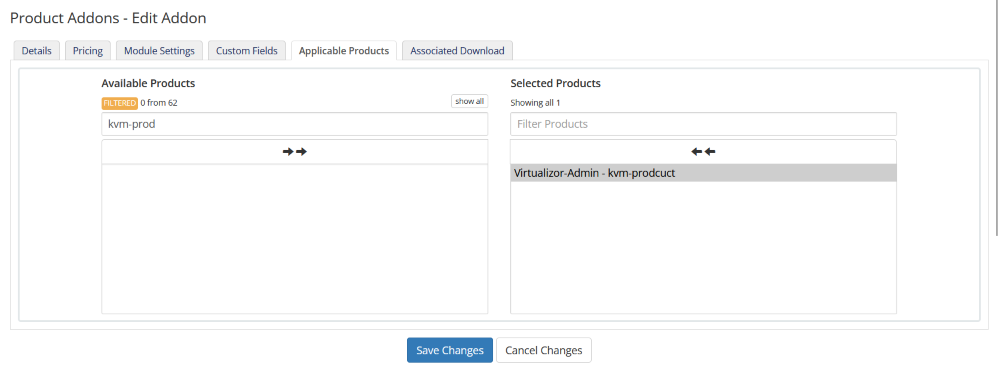
Step 4:
- Go to Applicable Products Tab
- Choose the VPS/Dedicated server Product with which you would like to offer this addon
- Click Save Changes to save your changes
Personal Dedicated Webuzo License
Just like we added Personal Cloud License we will add Personal Dedicated License
Professional Webuzo License
Just like we added Personal Cloud License we will add Professional License
Business Webuzo License
Just like we added Personal Cloud License we will add Business License
Editing Variables
This module allows you to customize some variables in webuzo_mod_extra.php
Billing Period
By default, the billing cycle is detected for the WHMCS order being
created and the same is used for the Webuzo license period. If the
detection fails the default value used is 1M i.e. Monthly. However, if
you would like to overwrite the billing cycle then you can define the
above variable in the webuzo_mod_extra.php file provided in the zip file.
This
variable allows you to choose the period to extend for Webuzo license
when the WHMCS product service is CREATED and RENEWED. Default is 1M
i.e. 1 month if you do not specify this variable. You can set the
period to extend as per your desire
Possible values :
1M = 1 month
3M = 3 months
6M = 6 months
1Y = 1 year
2Y = 2 years
3Y = 3 years
$GLOBALS['webuzo_mod_conf']['billing_period'] = '1M';Cancel on Suspension
If you would like to cancel the Webuzo license when the WHMCS service is suspended please set the following variable in webuzo_mod_extra.php
$GLOBALS['webuzo_mod_conf']['cancel_on_suspension'] = 1;
Testing the Setup
You can test the setup by making a DUMMY Order and choose the Addon while placing the order and going to the settings of that order.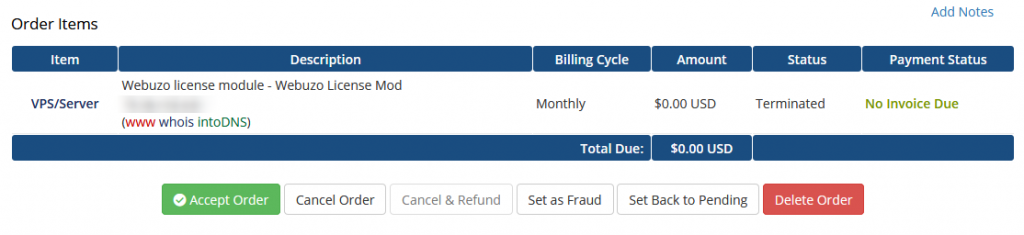
Creating License
- Make sure the Addon is selected with the correct Webuzo Plan as mentioned above.
- Click on the Create button to issue a License for the server IP.
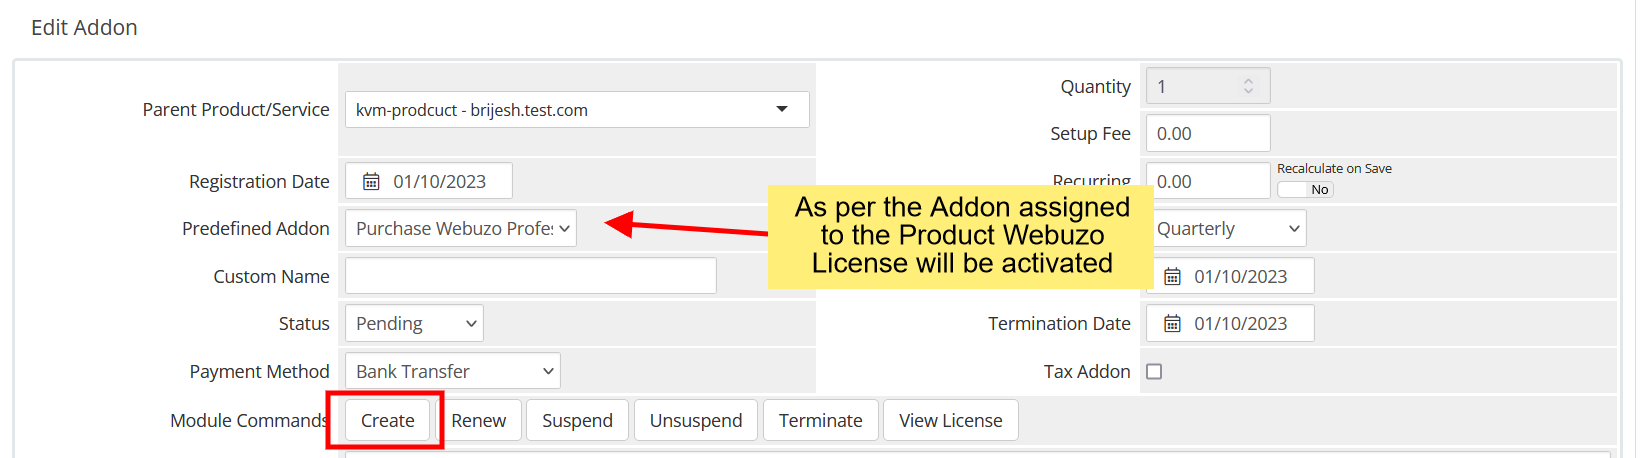
Similarly, you can test the Suspend, Unsuspend, Terminate and View License commands as well.
- In case of Terminate, the license will be cancelled and if the license was issued less than 7 days ago the transaction will be refunded.
- In case of View License, you will be redirected to Softaculous Client Center.
Success Message
When the page reloads the following message will be shown in case of success:
Error Message
In case of Failure errors will be shown as follows:
Support
If you need any further information, please contact us at support@webuzo.com