
Overview
Webuzo supports the remote creation of hosting accounts or reseller accounts via billing systems like WHMCS. WHMCS can be configured to create the account as soon as you accept the Order (Automatically or Manually). We provide a module for WHMCS to enable you to do so. Setting it up is really easy. You can create, delete, suspend a hosting account with this module.
The endusers i.e. hosting account(s) or reseller account(s) can also manage their data through the WHMCS interface without actually logging into Webuzo.
Requirements
WHMCS 7 or WHMCS 8 will be required for this module.
Download
Download the Webuzo WHMCS module from HERE.
Unzip it and upload the folder webuzo (the folder itself), in your /path/to/whmcs/modules/servers/ directory.
Please make sure that the upload was done properly and the following folder exists :
/path/to/whmcs/modules/servers/webuzo
Ports
Webuzo uses ports from 2002 – 2005. If there is any firewall restricting this, you will need to allow these ports. If you are using custom ports on Webuzo panel please set the same in webuzo_conf.php
Webuzo Server API Keys
You will need to create API Keys in Webuzo to add the server to WHMCS.
To do this go to your Webuzo Admin Panel -> Settings -> API Keys and click on Add New


Adding Server to WHMCS
Note : Only Master server needs to be added on WHMCS.
To add the Webuzo Server to WHMCS login to WHMCS Admin Panel. Then go to WHMCS Admin Panel -> Setup -> Servers -> Add New Server
Fill the form as shown in the below image :


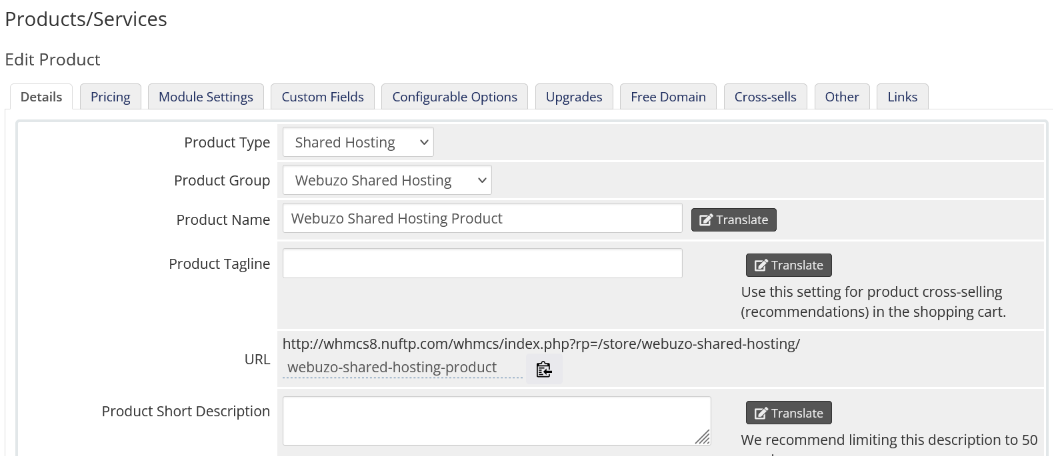
Creating a Product
Now, you will need to create a product.
Product
To do so go to WHMCS Admin Panel -> Setup -> Products/Services -> Create a New Product
Fill in the details as per the following image and specify the Products Name of your choice.

Module Settings
The WHMCS module we have made is very simple. You will need to edit the Module Settings to load the plan of your Webuzo Server. Choose the Module Name and setup the fields as shown in the image below :
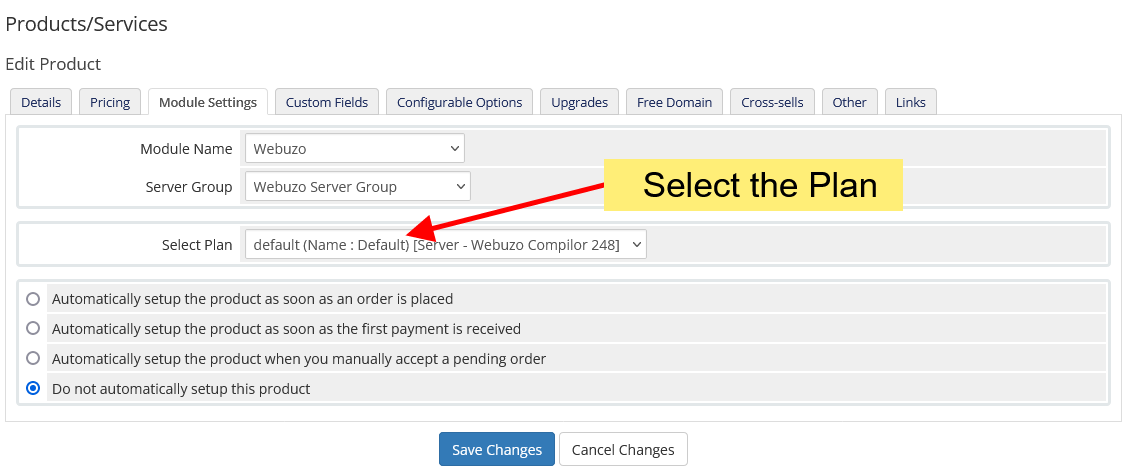
The Fields are:
- Server Group : Select the Server Group that you added previously. Select the server group and click on Save Changes. Once the changes are saved, you will get the list of Plans. Until then Plans will be empty.
- Select Plan :
Select the plan for the user account. The new User account will
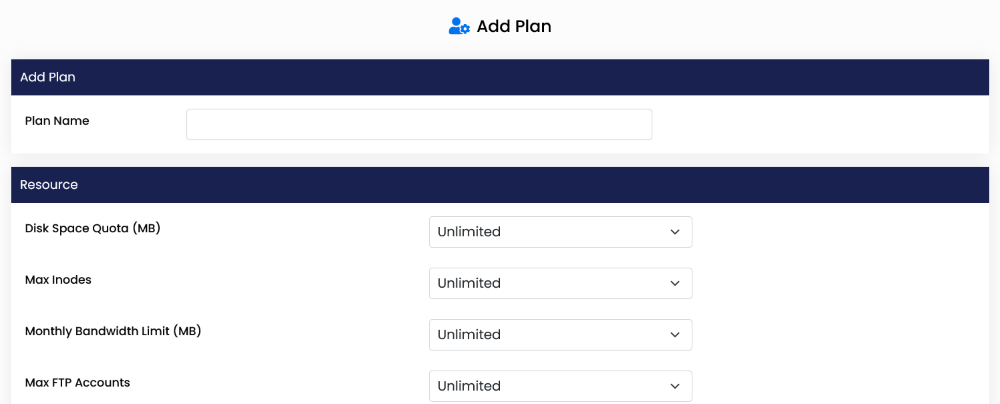
be created with this plan. If you haven’t created a Webuzo Plan you
will need to first create the Plan in the Webuzo Admin Panel :
You can bill your users and resellers based on their actual resource usage like Disk, Bandwidth, Inodes, Addon Domain, MySQL Databases, and much more.
You can configure this from Module Settings section on your Product page as shown in the screenshot below. 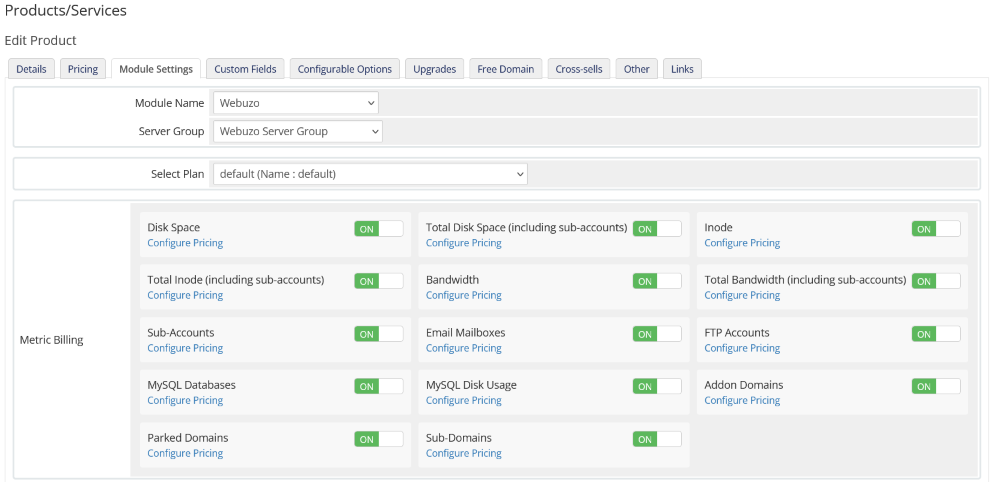
Now Click on the Custom Fields Tab and fill in the form as per the following image :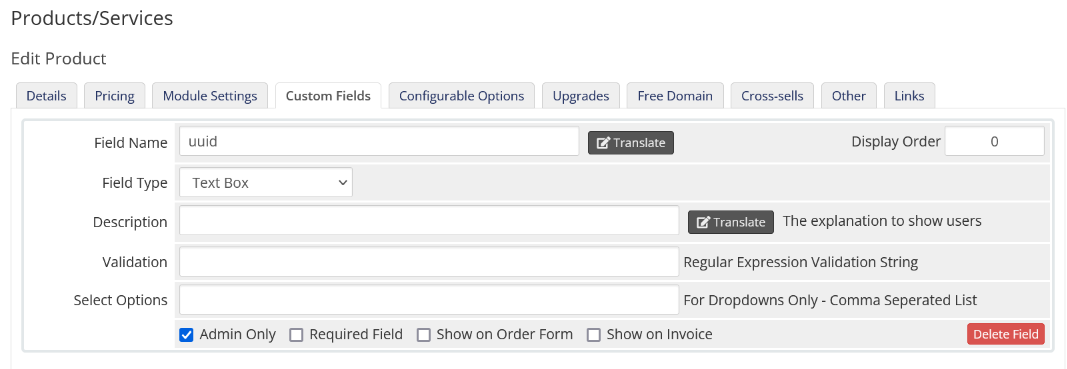

Just for your information the uuid is the Users UUID as per the Webuzo Admin Panel Database and needs to be stored for any future action like Terminate, Suspend, etc. Please fill it as per the above Image.
Please save the changes and your product is now configured and users can purchase the hosting accounts in this manner.
Features
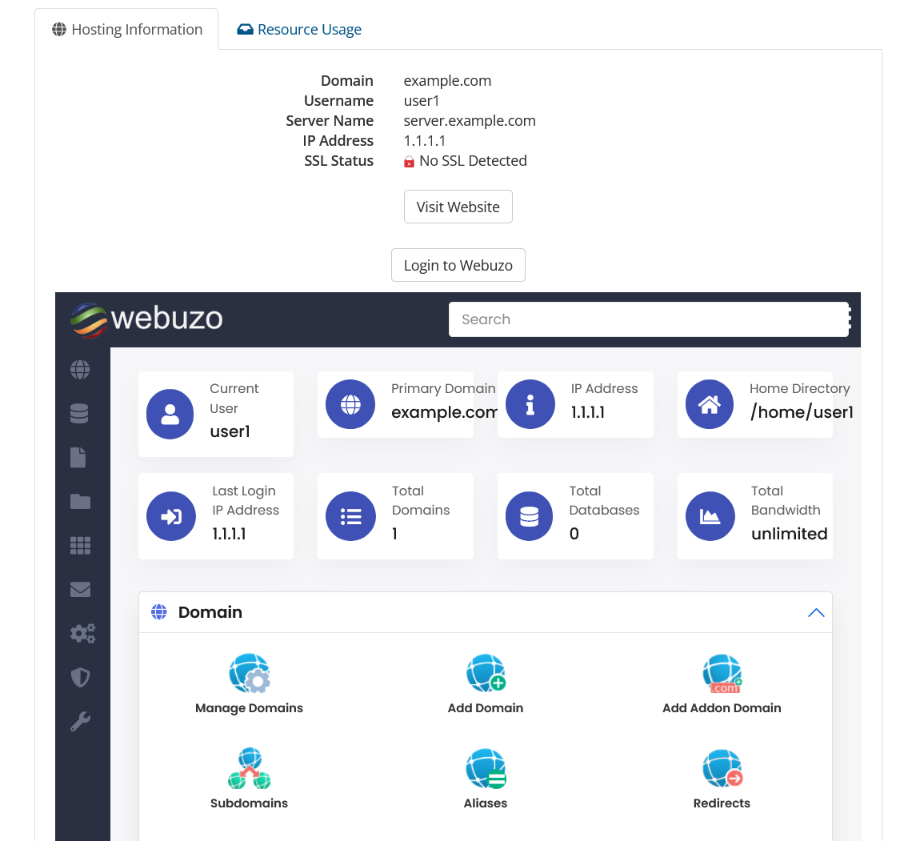
Account Information View in WHMCS Client Panel
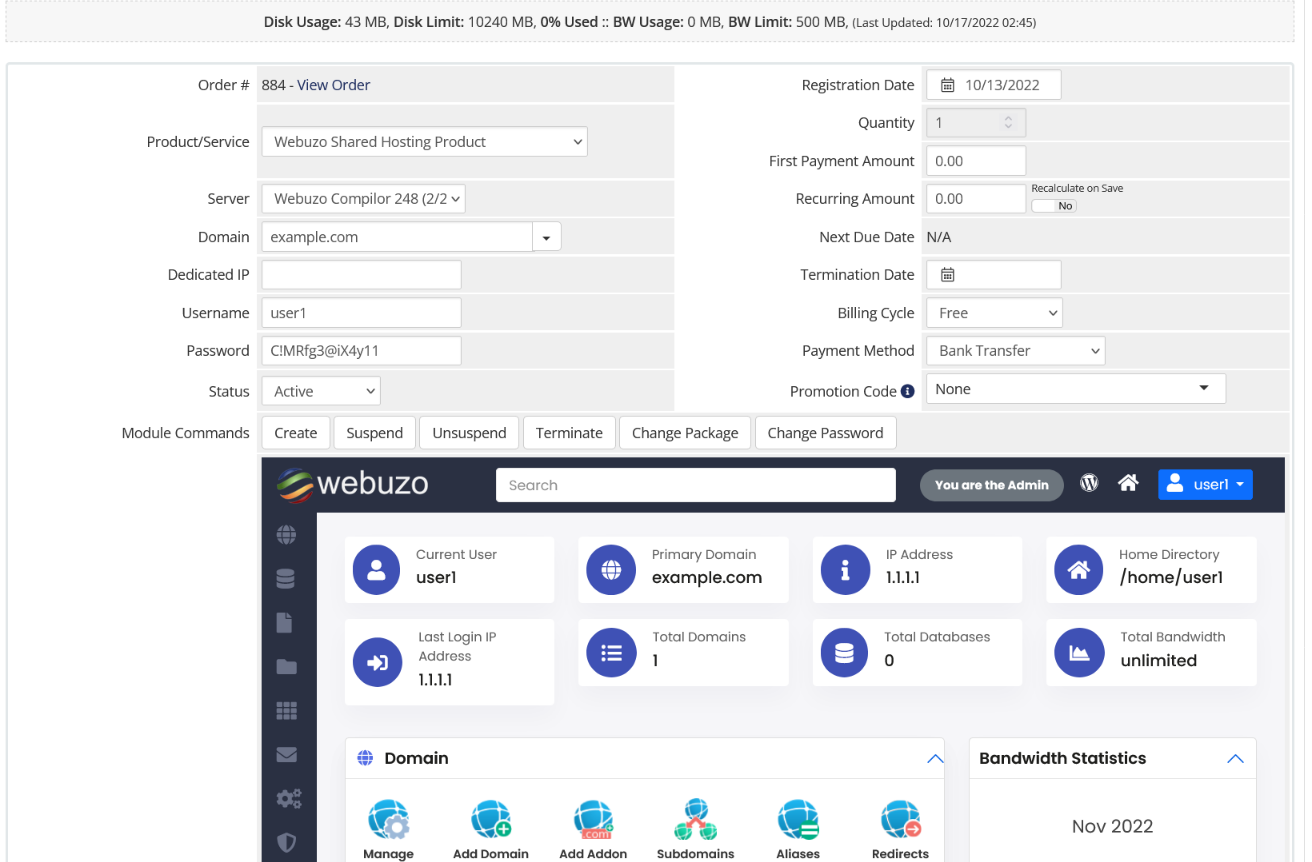
Account Information View in the WHMCS Admin Panel
Server Details
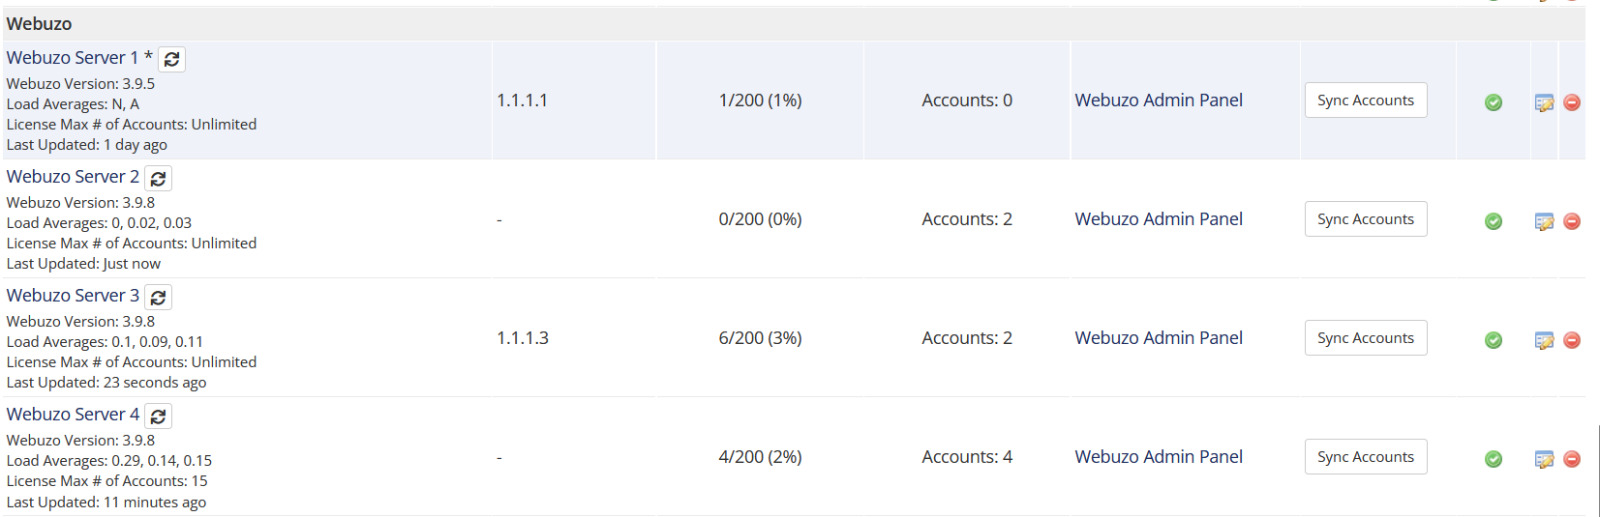
On the Servers page in WHMCS you can view the details of your server i.e. Webuzo version, Load Average, Number of Accounts.
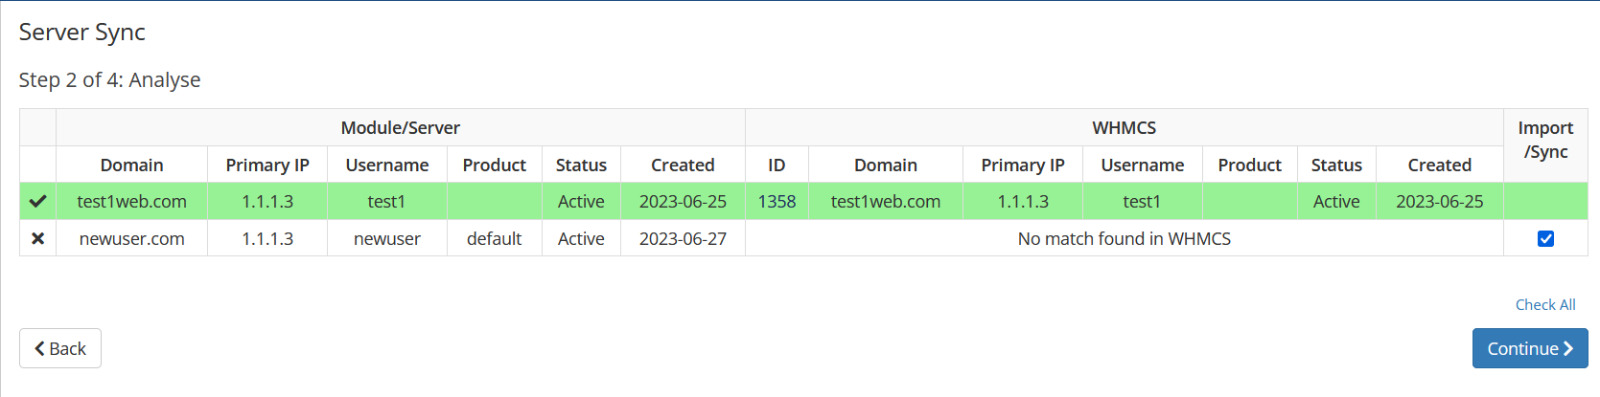
Sync Accounts
You can also sync the accounts between Webuzo server and your WHMCS billing panel.
Configuration
The module allows to configure certain settings which are explained below.
You need to change these values in webuzo_conf.php
If the file does not exists in modules/servers/webuzo you can create a new one.
Set 1 to enable logging in WHMCS -> Activity Log
$webuzo_conf['loglevel'] = '0';
Set 1 to hide Webuzo panel in WHMCS admin panel
$webuzo_conf['admin_ui']['hide_webuzo_panel'] = '0';
Set 1 to hide Login to Webuzo button in WHMCS sidebar
$webuzo_conf['client_ui']['hide_sidebar'] = 0;
Set 1 to hide Webuzo panel in WHMCS Enduser panel
$webuzo_conf['client_ui']['hide_webuzo_panel'] = '0';
Set 1 to hide Login to Webuzo button in WHMCS enduser panel under the Hosting Information section
$webuzo_conf['client_ui']['hide_login_btn_hosting_info'] = '0';
Set 1 to hide Webuzo panel in WHMCS Admin as well as Enduser panel
$webuzo_conf['hide_webuzo_panel'] = '0';
Set the Webuzo ports if you are using custom ports on Webuzo
$webuzo_conf['custom_ports']['admin_ssl'] = '';
$webuzo_conf['custom_ports']['admin_nonssl'] = '';
$webuzo_conf['custom_ports']['enduser_ssl'] = '';
$webuzo_conf['custom_ports']['enduser_nonssl'] = '';
Set 1 to disable Account Termination from WHMCS Admin panel
$webuzo_conf['admin_ui']['disable_terminate'] = 0;
Support
If you need any assistance then please contact Webuzo Support. Please send us a screenshot of the Module Settings and the Custom Fields you added to the Product.